Zomalex | Data and AI Training
Modern Data Modelling - Setup Claude
Claude Desktop is a local application that provides access to the Claude AI models and will connect to the Power BI Modeling MCP server. We will download, install then configure the Claude Desktop app so it can use the MCP Server.
Install the Claude Desktop app
Open Claude. Download and install Claude Desktop
Sign in to the Claude desktop app eith the account created earlier.
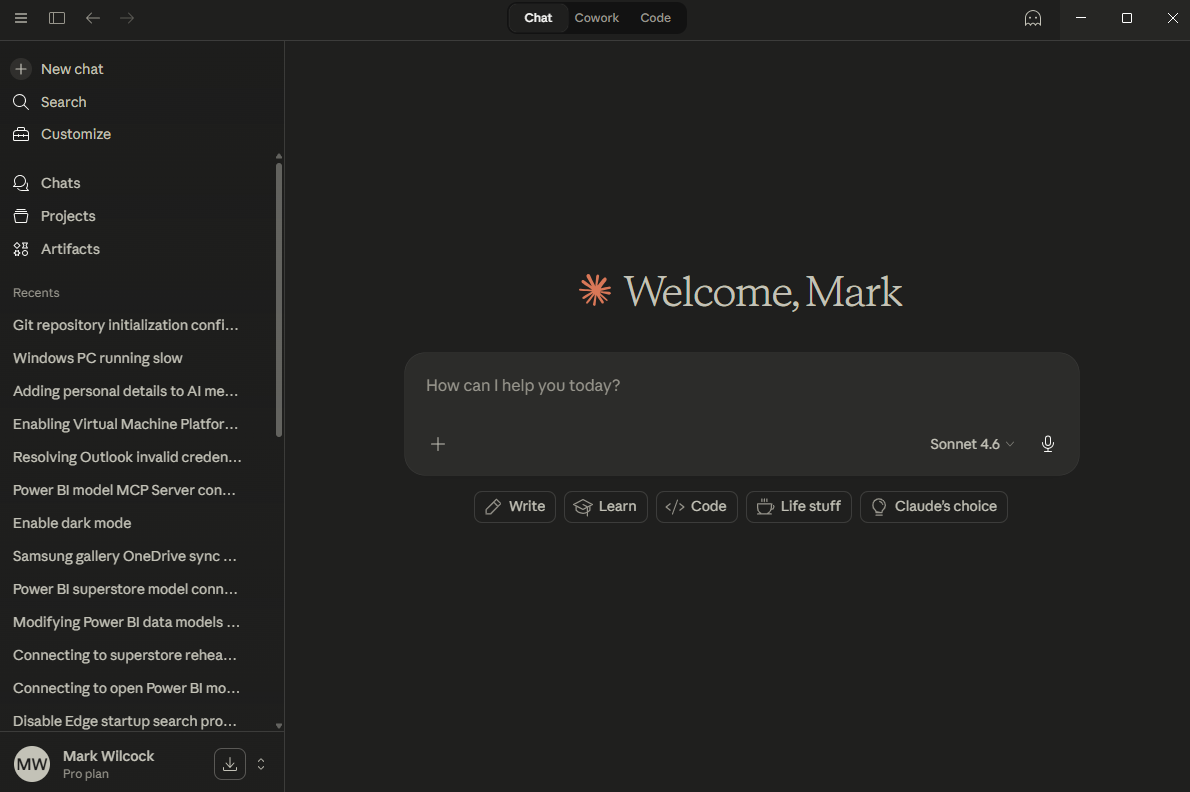
Example of the Claude app on a paid (pro) plan. Free plans will not have the Cowork and Code capabilities
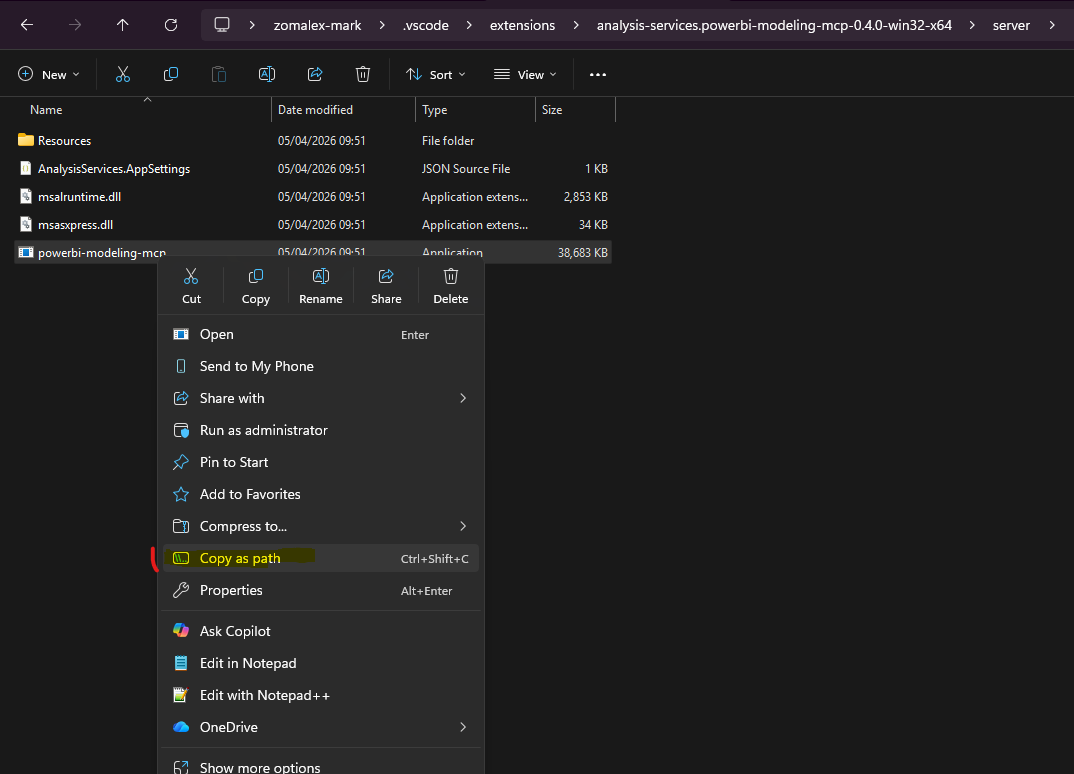
Get the full file path of the Power BI Modeling MCP server app on your PC
In File Explorer, type into the address bar
%USERPROFILE%\.vscode\extensions
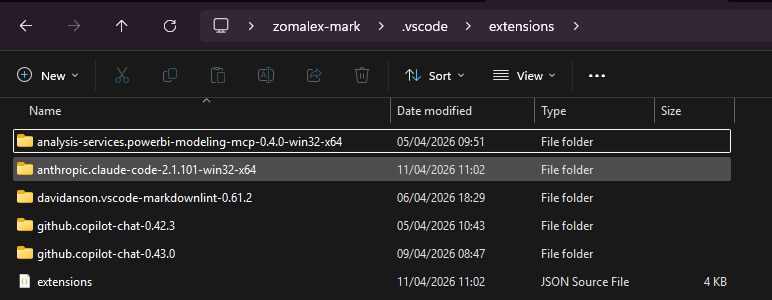
then select the “analysis-services.powerbi-modeling-mcp-0.4.0-win32-x64” (exact name may vary) folder then the “server” folder.
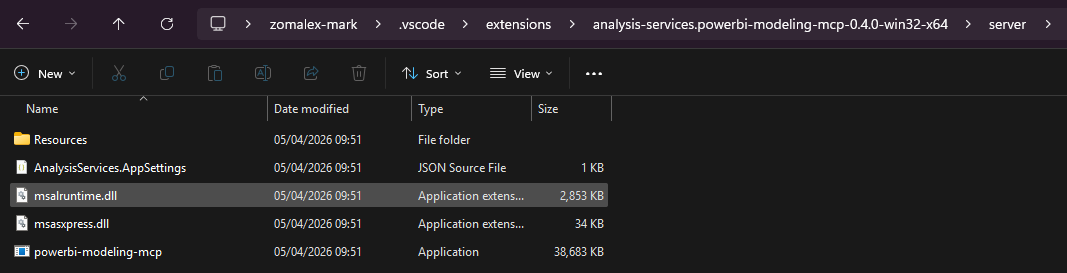
Copy the path to the powerbi-modeling-mcp.exe file to the clipboard.
This will be something like
“C:\Users\your-account\.vscode\extensions\analysis-services.powerbi-modeling-mcp-0.4.0-win32-x64\server\powerbi-modeling-mcp.exe”
Edit this string in an editor such as VSCode or notepad. Replace each backslash with double backslashes. The end result will look like
“C:\\Users\\your-account\\.vscode\\extensions\\analysis-services.powerbi-modeling-mcp-0.4.0-win32-x64\\server\\powerbi-modeling-mcp.exe”
Edit this string into a mcpServers section of code
Copy the section below into notepad. Replace the command argument with your actual string i.e.the path to the MCP server executable that was installed with the VSCode extension.
  "mcpServers": {
    "powerbi-modeling-mcp": {
      "command": "C:\\Users\\your-account\\.vscode\\extensions\\analysis-services.powerbi-modeling-mcp-0.40-win32-x64\\server\\powerbi-modeling-mcp.exe",
      "args": ["--start"],
      "type": "stdio"
    }
  }
Edit the Claude config file to add this string
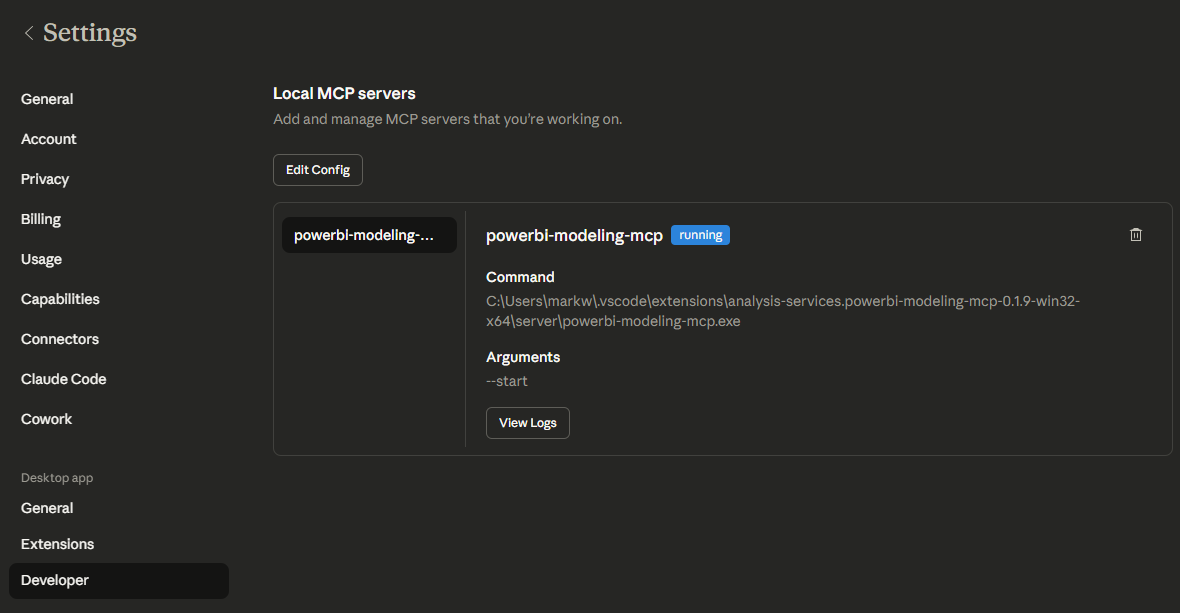
In Claude Desktop, go to the ‘Settings’ then ‘Developer’ section then click the “Edit Config” button. It will list local MCP servers (probably none are running).
Click the “Edit Config” button. This will open a File Explorer window in a folder similar to
C:\Users\<your account>\AppData\.....\.....\Roaming\Claude
This folder contains the claude_desktop_config.json file.
For safety, make a copy of this file e.g. claude_desktop_config_original.json.
Edit the claude_desktop_config.json file. This may be empty or already have a preferences and other sections.
If claude_desktop_config.json is empty, add the mcpServers section above
    "mcpServers": {
    "powerbi-modeling-mcp": {
      "command": "C:\\Users\\your-account\\.vscode\\extensions\\analysis-services.powerbi-modeling-mcp-0.40-win32-x64\\server\\powerbi-modeling-mcp.exe",
      "args": ["--start"],
      "type": "stdio"
    }
If claude_desktop_config.json already has a preferences or other sections, add the section and don’t forget the comma to separate the sections.
{
  "mcpServers": {
    "powerbi-modeling-mcp": {
      "command": "C:\\Users\\your-account\\.vscode\\extensions\\analysis-services.powerbi-modeling-mcp-0.4.0-win32-x64\\server\\powerbi-modeling-mcp.exe",
      "args": [
        "--start"
      ]
    }
  },
  "preferences": {
    "coworkScheduledTasksEnabled": true,
    "ccdScheduledTasksEnabled": true,
    "sidebarMode": "chat",
    "coworkWebSearchEnabled": true
  }
}
Close the Claude app, close all Claude processes in Task Manager, then launch the Claude app again.
Finally check that the MCP server is now connected. The Claude Desktop screen should now look like the screenshot below.